Choosing Fence Panels | Options for Timber Buildings | How to Install Panel Fencing | Assembling Timber Buildings | How to Guides
A step-by-step guide to installing panel fencing on timber or concrete posts.
Tools Required
- String line
- Spirit level
- Hammer
- Grafter or spade
- Shovel holer
- Tape measure
- Saw
Fixings Required
- Panel clips
- 40mm galvanised nails
Step 1
Ensure the area is clear from obstructions such as old fence posts, bushes, or anything that may interfere with the new fence line.
Step 2
Check all underground services. The area must be clear of pipes and cables for at least two feet underground. Erect the string line to mark the fence boundary.
Step 3
Select your concrete or timber post.
Step 4
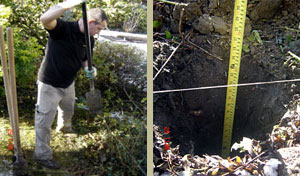
Dig a two foot deep hole and insert post.
Step 5
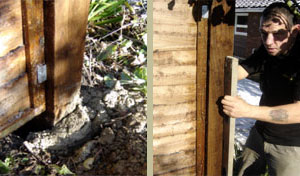
Ensure that the post is the correct height for the fence, allowing for gravel boards if used. Use a spirit level to make sure the post is upright. Put ‘Rapid Set Post Kwik’ into the hole, add the correct amount of water and mix.
Step 6
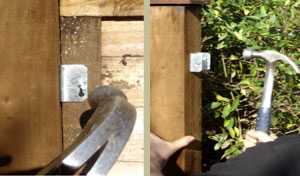
Concrete slotted posts do not require panel clips. For wooden posts attach the panel clips to the posts and then fix the panels to the clips. Keep a spirit level on top of the panel to make sure the fence remains level on top.
Step 7
Repeat steps 4, 5 and 6 until all your panels are installed. The last panel may need to be reduced in width to finish off the gap. This can be done with a handsaw.